
Have you ever pushed through so much bush that it physically pains you, and causes emotional trauma to the degree that it haunts you for days? I have, and I recommend that every hiker/mountaineer does it at least a few times in their life. It gives you perspective: in some ways, it makes you enjoy an unimpeded trail that much more!
 |
| Phil about to descend to the lake |
Philip Stone dedicates a portion of his book Island Alpine (2003) to a series of Top Ten lists, including a section for the top ten bushwhacks. Since publication, the face of alpinism on Vancouver Island has changed. The rock hasn’t changed, but gear has improved, new logging roads have been punched through, many roads have grown over, some routes have been placed and others cleared. The Top Ten lists are still important, but at least a few of them need updating, and the list of Island bushwhacks is one of them. Keep in mind that this is just one blogger’s opinion, but I think this route should be considered for the list.
On Sunday January 24th, Phil Jackson and I made a solid Rambler attempt to summit Steamboat Peak using a route named The Cavers Trail, a route set by Quagger sometime before 2003. I was warned about the route, which lies along Highway 4 and is filled with classic Highway 4 bush. True to the claim, I’ll testify that this route is filled with many sections of solid class 3/4 bush. This is the type that claws at you as you work your way through all manner of vegetation. It hooks gear and rips at your flesh. I made it through with only a dozen scratches on my hands and a few marks on my face.
 |
| Clayoquot Plateau Lake Map and GPS Route with Photos |
Total Distance: 9.3 km
Starting Elevation: 66 metres
Maximum Elevation: 883 m
Elevation Gain: 919 m
Total Time: 8 hours 15 minutes
The Cavers Trail is accessed via the Zipline Trail. We parked at the gate to the zipline attraction (60m), and walked through the yard and over the old bridge crossing the Kennedy River. My understanding is that the first section of the logging road is part of the Clayoquot Valley Witness Trail, and in the Backroads Mapbook it’s referred to as Kenquotmn Road. The deactivated road looks as though it hasn’t seen motorized traffic in years, with small saplings and other vegetation springing up along the road. Less than a kilometer down the road, we spotted our first ribbon and a small stack of moss-covered rocks, so we turned right up the Ken9 Road branch. Things got bushy. We continued along this road, watching on the left for a flagging. The farther up the road we pushed, the more vegetation we pushed through.
 |
| Start of the cavers trail |
Eventually, we spotted our goal, the start of the Cavers route. Shortly after crossing a dry creek bed, we spotted a line of pink ribbon leading up into the dense forest. It didn’t take long before we were in the thick of it! Mostly the route is well-marked with ribbons. We rarely needed to examine our GPS to keep on track. However, to call it a route is being generous. It’s a walk through the woods – over fallen trees, ferns, brambles, alder, and of course dense cedar and hemlock. It took more than stalwart determination to continue on the route. At times, we crawled on all fours. At other times, we scrambled over and along fallen trees two metres off the ground. Physically, the track is challenging; mentally, it’s exhausting.
 |
| Phil in one of the less bushy sections |
We started hiking shortly before 7:45 am, with the car parked at 66m of elevation. It took us until 10:00 to reach 450 metres, where the terrain opens to mature forest. Even then, the route remains challenging, and we moved up the southeast slope, over steep embankments, roots, and wet rock. Our hope was to make the lake on the plateau before 11:00 am, as we needed the extra time to make the summit.
 |
| Phil approaching the lake on the plateau |
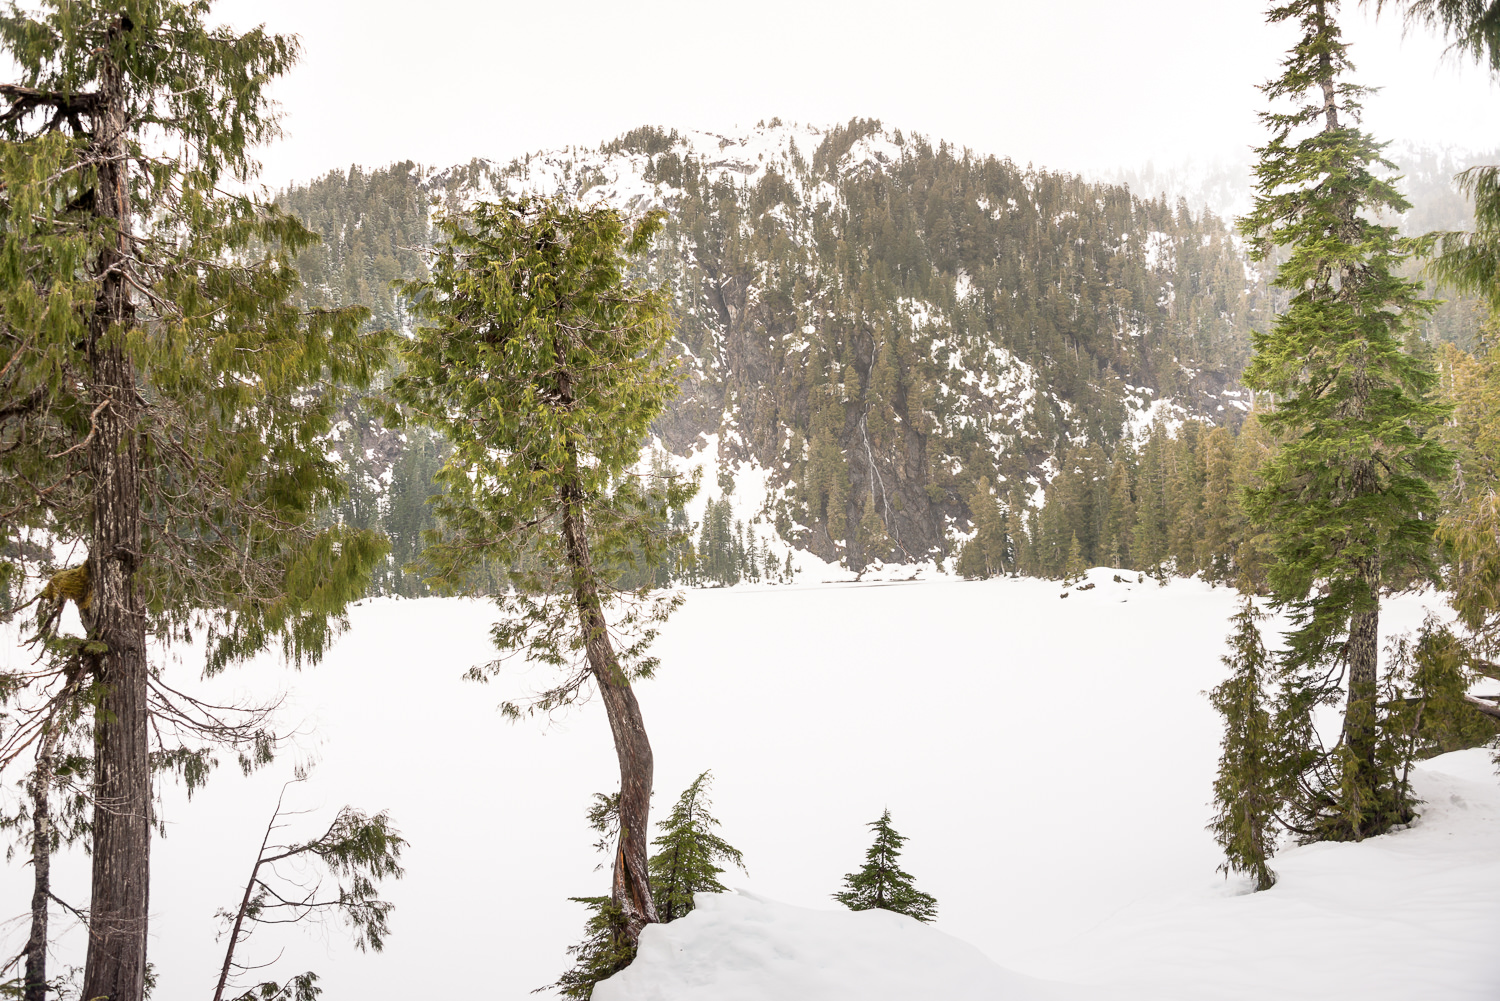 |
| looking across the lake, Steamboat Mountain to the right of the image |
We wouldn’t make it. By 11:00, we were just below the crest of the ridge at the lake. We found the snow at 700 metres; we had expected to find it much lower down the hill. The conditions were poor, and we wasted precious time. The hard surface crust was uneven, and we frequently broke through the crusty surface to the slushy mess beneath. More than a few times, we found ourselves up to our knees. Not only was it tiring and frustrating, but it took a lot of time to extricate ourselves. It wasn’t until just before noon that we arrived at the snow-covered lake.
 |
| At the water’s edge, Clayoquot Plateau lake |
 |
| Waterfall across the lake on the pleateau |
As my first visit to the Clayoquot Plateau, it didn’t disappoint! The steep slopes of the surrounding mountains sweep directly into the lake. A beautiful waterfall poured down the side of a cliff face on the opposing side of the lake. The water splashed down in a small section of the lake that remained snow-free. As we contemplated the time, snow began falling and our view of Steamboat Mountain was soon obscured. This wasn’t our day. Not only were the snow conditions very poor, the avalanche bulletin predicted high risk level. Still, it was so tempting to carry on; we were less than two kilometres and 700 metres from the summit! My desire to never hike this bushy route again was powerful. In the end, we chose to play it safe. The prospect of walking the Cavers Trail in the dark is insane. Don’t do it – we didn’t. After our lunch, not long after noon, we turned around and headed down the mountain.
 |
| Steamboat Mountain enshrouded |

Descending is a lot easier, with gravity helping us through the sections where vegetation clawed at us. On the lowest sections of the route, before we rejoined the logging road, we followed a slightly different path. Some sections were better and some sections were worse. We arrived back at the car at 3:45 pm, with lots of light left.
I have a few recommendations to make this route easier:
Pack slim. This doesn’t mean “light”. Make sure you have everything strapped and packed tight. Try not to have anything above your shoulders, or sticking out the sides. This will make ducking under logs and squeezing through vegetation easier.
Regarding the route: at the lower elevations, just above the logging road (Ken9 Road), there are two flagged routes, with each offering its own challenges. Next time I attempt this route, I’ll follow the deactivated logging road to its end. Past the first set of route flagging, at the end of the road, there is a better route that passes up a dried river bed. It bypasses a couple sections that are crappy to traverse. Eventually, both routes pop out at a mossy rock face and you have a choice of two directions: up and over the rocky moss, or to the right. I found that the route to the right was a bit easier, but both require some degree of scrambling up and over rock.
Comments
Wow! An epic. So you averaged about 1k per hr. That's tough slogging!
Pingback: Steamboat Mountain: A Walk on Fluted Limestone - Explorington
Pingback: Steamboat Mountain: A Walk on Fluted Limestone - Island Mountain Ramblers