
Each summer I look forward to one of two longer multi-day trips, mountaineering through Vancouver Island’s back backcountry. I set the time aside and plan most of my summer around these trips. They become the focus of the summer. This summer we planned a 7-day trek through Strathcona Park, along the Wolf/Cervus Divide. Unfortunately, Mother Nature had other plans.
As the day of departure came, the long range weather forecast looked bleak: three days of heavy rain. It’s not the rain that doused our trip plans, we’ve hiked and camped in many a deluge. However, along with the rain the forecast predicted multiple days of lighting! Instead, we traveled farther north, to avoid the inclement weather, and used the days to do some climbing in the Bonanza Range. This report is for the first day Mount Ashwood and Bonanza Peak!
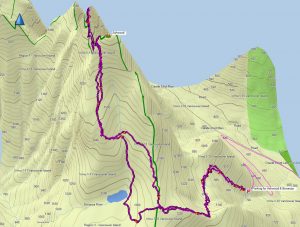
Mount Ashwood and Bonanza Map and GPS Route
Total Distance:10.9 km
Starting Elevation: 690 m
Maximum Elevation: 1746 m
Total Elevation Gain: 1488 m
Total Time: 11 hours
Our hearts were heavy as we loaded into my Jeep at Rick’s house on Saturday, July 16th. Even though we knew we were making the right choice, we were disappointed because we had been planning the trip for months. Our consolation was an opportunity to do a different kind of mountaineering, base camping! We wouldn’t be traversing the Bonanza Range, instead we would do a series of day hikes and do some car camping, each night at a lake. This offered certain advantages, like visiting port McNeil to refuel, buy “normal” food and drinks, and visit a few restaurants. Further, it would mean that we would spend a lot less time in the vehicle and check off a lot of the peaks in the Bonanza Range, moving closer to fulfilling my Island Alpine Quest.
We drove north seeking our first two peaks on our 4-day Bonanza Range adventure! We approached using a spur off the Claude Elliot mainline, eventually taking advantage of the 4-Lo capabilities of the Jeep to climb up the steep old logging roads and through a few wicked cross ditches. We arrived at the terminus (~700 m) at it’s terminus at 9:30. The clear skies gave us a view of the ridge above. As we looked just a little bit of the weight on our hearts was lifted.

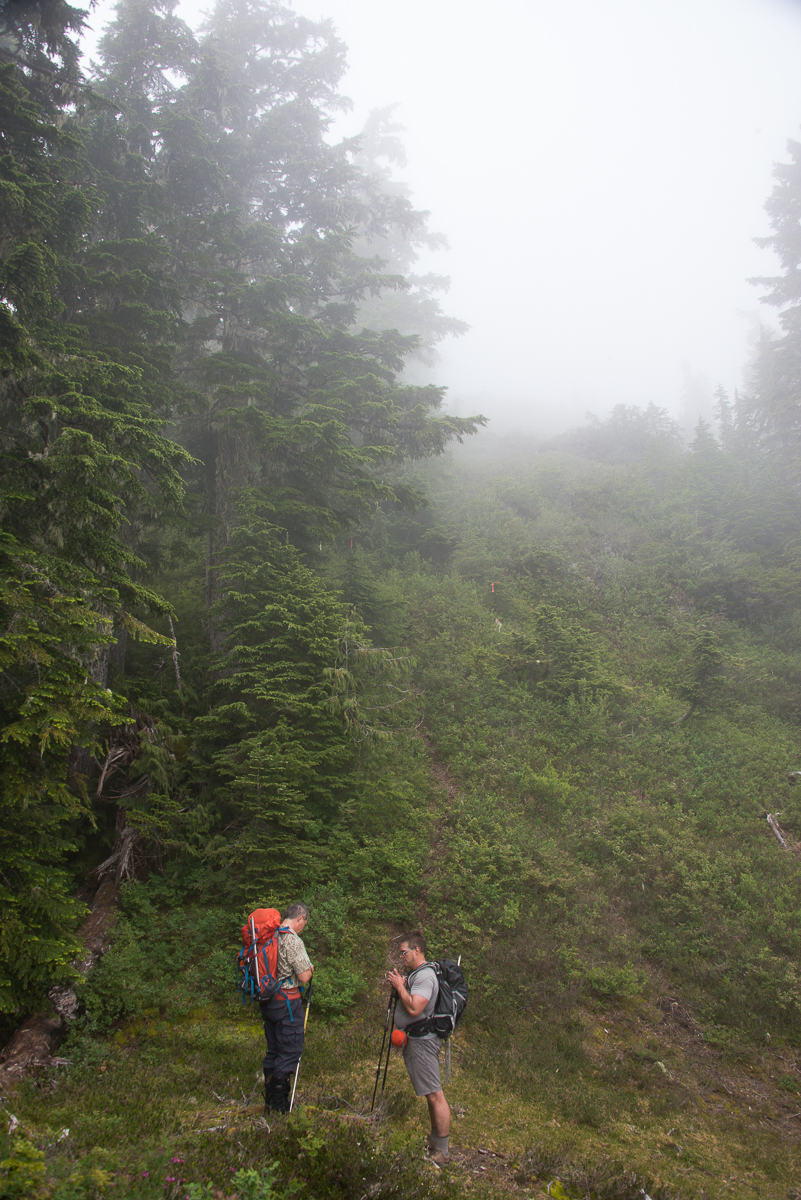
Following an elk trail up through the logging slash.
From our parking spot, we entered a short section of slash but found what looked almost like an elk trail leading up into the old grown above. We wasted no time getting to the old growth and stripped down to our base layers to avoid the humidity of the forest. As we hiked up the easy open terrain westward, we followed an old water course up to a lower plateau (~1000m). It wasn’t all trees and leaves, as we walked we noted sections of old sun bleached flagging dangling from the branches, and sometimes on the forest floor.
The route heads along an obvious path, though we had a route on our GPS we seldom referred to it, mostly we were unimpeded but periodically we used our hands to push low bush and shrubs out of our path. Once on the plateau (~1000m) we pathed around the dense alpine fir and walked south toward an ancient water course that climbs higher up the mountain.
Shortly after departing the old watercourse we approached the toe of a low-alpine ridge (~1230). It climbs quickly up and out of the trees, leading to flatter areas above where the easy navigation became even easier! Once we cleared any semblance of brush were finally rewarded with our first views of the day.
Phil and Rick providing a feast for the insects
We stopped to admire it and attempted to eat a bar. Within two minutes, the bugs found us. We were pushed along by an onslaught of mosquitoes and blackflies. At one point Rick had more than 50 mosquitos buzzing his pant legs. I tried to catch a photo but gave up as I killed nearly a dozen that tried to bite my hands. If you watch the video you can see dozens of flecks in the air, those are bugs! We briefly considered putting on our jackets but it was too hot; instead, we continued onward.
We arrived at the crest of a hill (~1335 m) and looked into a fog covered cirque through which we could just make out the features including a lake. We dropped down a series of broad steps into the cirque and strolled over the snow-free rocky terrain. The fog deprived us of what I’m sure is a stunning view of the lake and surrounding mountains but the significance of the location was not lost on use. The largest melt-water fed tarn seems insignificant but the trickle of water coming from the west end is the source of the Bonanza River, the river that feeds Bonanza Lake.


From the lake we scrambled up the rocks on the left of a snowy gully to gain the pass below the summit of Ashwood. We could finally see both our objectives for the first time. looking to the north we could see Bonanza Peak. It looks daunting, much more aggressive than our route description indicated; but, fortunately, Mount Ashwood was much easier. We left our gear at the pass and scrambled up some easy rock toward the summit. Within a few minutes we were enjoying our reward. We celebrated our first summit of the multi-day trip by ripping off our shirts off-I mean, I didn’t do it, but the others did. However, we didn’t waste time before heading back down to our gear.
-
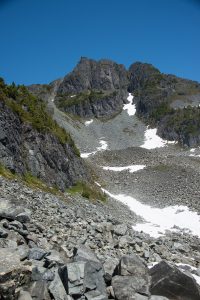
- walking up the choss toward Mount Ashwood

-

- At the pass looking toward Bonanza Peak

-

- Hercules


Phil and Rick descending the steep slope toward the notch.
As we stood looking at the descent, Phil dislodged a rock and sent a small pile of rotten rock careening down in front of us. Phil was very close to following down after it. We set a rappel and took our turns descending into the notch. At the narrow base, it’s less than 15 m wide, we crossed and then immediately scrambled up 30 metres to the top of the ridge. We were all happy to scramble out of the notch and back on the move toward Bonanza Peak.

Looking back toward Mount Ashwood from the ridge between the two peaks
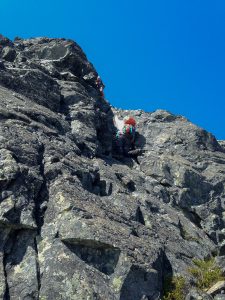
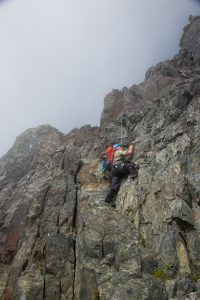
As we approached Bonanza we started to see a possible route up the aggressive looking rock. Our research called the route class four but by my standards it was more complicated. The scrambling is easy enough and except for one obstacle it would be easy. After climbing a short section we had to traverse to the left before continuing up another short section; but, in the middle of the traverse there is a large chockstone sitting on the very narrow ledge.
From my perspective, the body-sized stone looks to be resting against the rockface. I wasn’t ready to scramble over it without using a rope. Phil didn’t care. He climbed up and over it and then up to the ridge above, where he found a rappel station. He used this station to top belay us up. Finally, I was confident enough to put my own weight on the rock and climb up. Of course, the rock held our weight. This ascent was the final obstacle on our way to the summit, the remainder of the route was easy. We walked the choss on up to the slab summit and hopped a narrow gully to stand at the cairn by 4:00pm.
Our return to the pass below Ashwood was just as fun. We rappelled down, bypassing the chockstone on bonanza, and even set a rappel down into the notch between the ridge and Ashwood –hey we had the rope! Once at the base of the notch I wished we had brought an extra rope. We could have left it in place for the return trip. Instead, Phil free soloed up rock to the anchor above. Again top belayed us. The challenging section of this pitch is only about 5 metres in height, but the rock quality is terrible. As Phil climbed, I stood off to the side. He dislodged multiple rocks that nearly hit me. I was happy to be top belayed up this short section.
-
- Climbing up the toward the summit of Bonanza Peak
-
- Climbing out of the notch toward Mount Ashwood
Once we were back at our bags we set a quick pace and followed a variation of our original route to join up with our ascent route. Once below the exposed ridge, the bugs returned. There was no shaking them, as we descended they harassed us. Every few seconds we wiped the back of our arms, our faces, and any exposed skin to remove the bugs. We arrived back at the jeep at 8:00 pm. We still had more than an hour of light in the day to find a camp and get some dinner. We loaded into the vehicle and descended and found our camp for the night at Ida Lake Forest Rec site. We prepared water and planned our route for our second day in the Bonanza Range.
These two peaks were among my favourite of the year; but they earned a particularly loathsome name: The Buganza Range! Before heading to bed I tried to count the bites on the back of my arms. I stopped at two-hundred. There were many more across my hands and neck that I never counted. I did something I’ve never done before, I popped an antihistamine. As I slept the blackfly bites activated. I woke several times and by the next morning the back of each arm was swollen with bites. I’m not one to be bothered by bug bites but these were a nuisance. Over the next three days the swollen blackfly bites would chafe against my shirt, and eventually scab over!
As I crawled into my sleeping bag, the blackfly bites activated. I woke several times throughout the night and by the next morning the back of each arm was doubled in size. I’m not one to be bothered by bug bites but these were a particular bother! It was a great first day in the Bonanza Range, and the next three days would see us mount most of the peaks in the range. You can read my other adventures here. (coming soon)
Read more about my trip in the Bonanza Range:
Comments
Pingback: Whiltilla Mountain, Day two in the Bonanza Range - Explorington
Hi Mathew, I attempted Whiltilla Peak from the North side last summer, very steep, I was solo and managed to scale the wall to within a 150 meters of the summit plateau but the hand holds seemed to disappear from the rock face the higher I got making it very sketchy… My attempt to traverse around the summit massive to the less steep South approach ended at a very steep gorge that dropped to the valley below… The next time I go I will take the southern logging spur and go in from the less dramatic side..
WOW! That does sound dramatic! After that exciting route, you’ll probably find ours a bit boring! Let me know if you do it.
do you know: Is there a lot of snow up there this time of year?
Hi Michelle, Your best bet is to use a service like Sentinel Hub Playground to see what’s happening. My bet would be that there is a fair amount of snow.